
After many, many, many tests, I finally got a working configuration for my MultiFunction Samsung Printer (SCX 3405W) with the “Scan to PC” button. This button allows a direct scan to a configured computer (Mac or Windows, even if the config in Windows is really simple and automatic) from your printer: you can remain on your printer (scanner), change as many documents as you want, and go back to your computer just at the end with all documents saved in the desired format.
Install Samsung Easy Printer Manager#
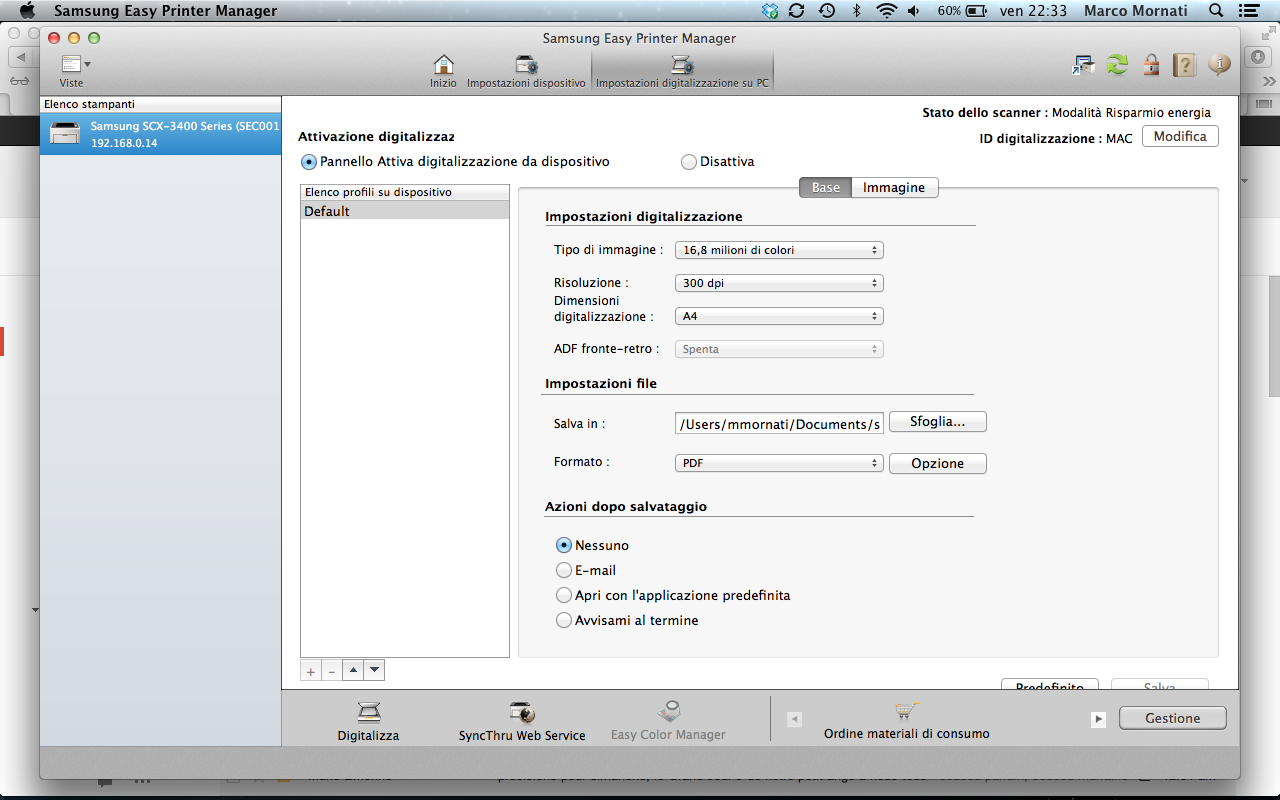
First of all, you need to install the “Samsung Easy Printer Manager” software on your Mac, start it, and go to Advanced Mode.
[warning]
If you can’t reach this window (program crash when you click on the button) like me at the beginning, you should remove it using the Uninstall.sh script included in the downloaded ZIP.
Type, in a terminal:
sh Uninstall.shNow install it again, and this time it should work. [/warning]
In Advanced Mode, go to Scan to PC Settings and enable the function. Then configure:
- Computer name — your Mac’s hostname
- Shared folder — where scanned documents will be saved
- Access code — optional PIN for security
Configure Samba Sharing#
On your Mac, open System Preferences > Sharing and enable File Sharing. Add the folder you configured in the printer settings and ensure SMB is enabled.
Test the Scan#
Place a document on the scanner, press the Scan to PC button on the printer, select your computer from the list, and the scan should be saved directly to the configured folder.