
Home Assistant: use ZigBee buttons to control other protocol devices

In this blog post, I will show how you can use a ZigBee in a completely different and unusual way.
You can control devices using a different protocol (ex covers using ZWave) but also, and I find it much more important, to use the different buttons on the same controller to drive different lights/devices or do a different action based on the number of click within a short period.
Do you know the Philips Hue Switch? When you are simply binding it to lights, all the buttons get a specific function over those specific lights: toggle, increase or decrease intensity, and play a scenario. But I never used some of those buttons.
I'm going to describe everything we will see in this blog post using my actual configuration with Zigbee2MQTT. But by changing a little bit the event part, what we will see can be adapted to any ZigBee add-on.
The Direct Binding
The standard way to configure a button/switch is by binding it to a light or a group of lights within the addon.
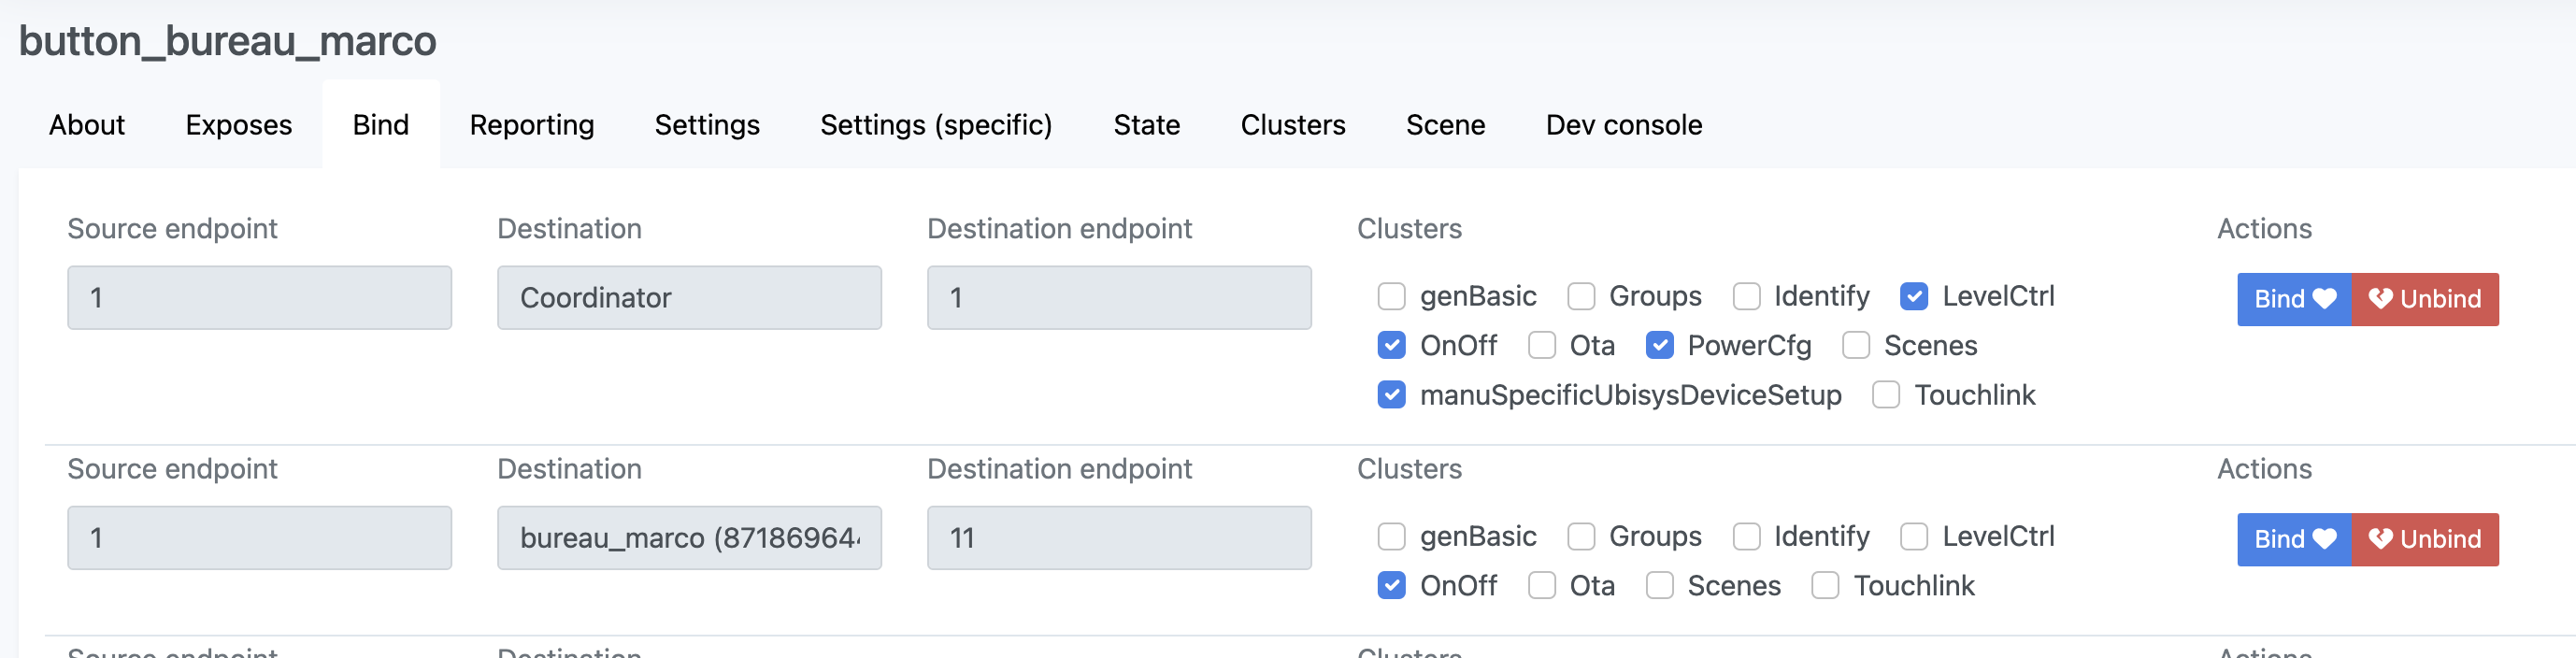
There is a huge advantage to doing this: the button and the light(s) are hardly connected, which means they can interact directly even without the home assistant or the zigbee2mqtt. In this way, never mind if you are restarting/upgrading/... your home assistant, the lights can be powered on and off using the physical button configured for this.
The side effect is that, at least within the Zigbee2MQTT add-on, you can do only a simple bind: the switch/button will do what is intended to do by default.
Button events
A different way to use buttons or switches is by detecting the generated events and then automating things over them.
But I started saying the side effects of this: events just go to Home Assistant if your ZigBee automation is started and home assistant can execute the automation only if the core is up too. So you can have some buttons going offline during "maintenance operation". It is for me an important point because can be a pain point for your family if you are geeking a lot with your home assistant 😅😱
What events are produced by my switch
Each button/switch produces all the time an event that is sent to Home Assistant. This means you have nothing to do more within your configuration to move from binding to event configuration.
But, what are the events produced by your button? It depends on the button you are using and sometimes even the brand can change the way events are generated.
To discover this event you can start a listener in the developer tools section of the home assistant, and, as I said at the beginning the event depends on your add-on: for Deconz is deconz_event, for ZHA is zha_event, ... And what about ZigBee2MQTT? The difference is that events are sent as messages on the message broker. So, instead of listening to an event, you can listen to a message topic. 😎
I'm doing this directly on the terminal. Do not know if there is a different way for this, but it is not too complex this way.
mosquitto_sub -h 127.0.0.1 -v -t "zigbee2mqtt/switch_entree"
The important part is in the -t parameter (the topic): you have to put the name of your device after the zigbee2mqtt.
WARNING: in the latest version of mosquito it seems you can't log in without strong authentication. You should then add to the previous command the -u and -P parameters to provide the username and password.
Once the script is executed, if an event of the device you want to check comes up, you will see it on the screen.
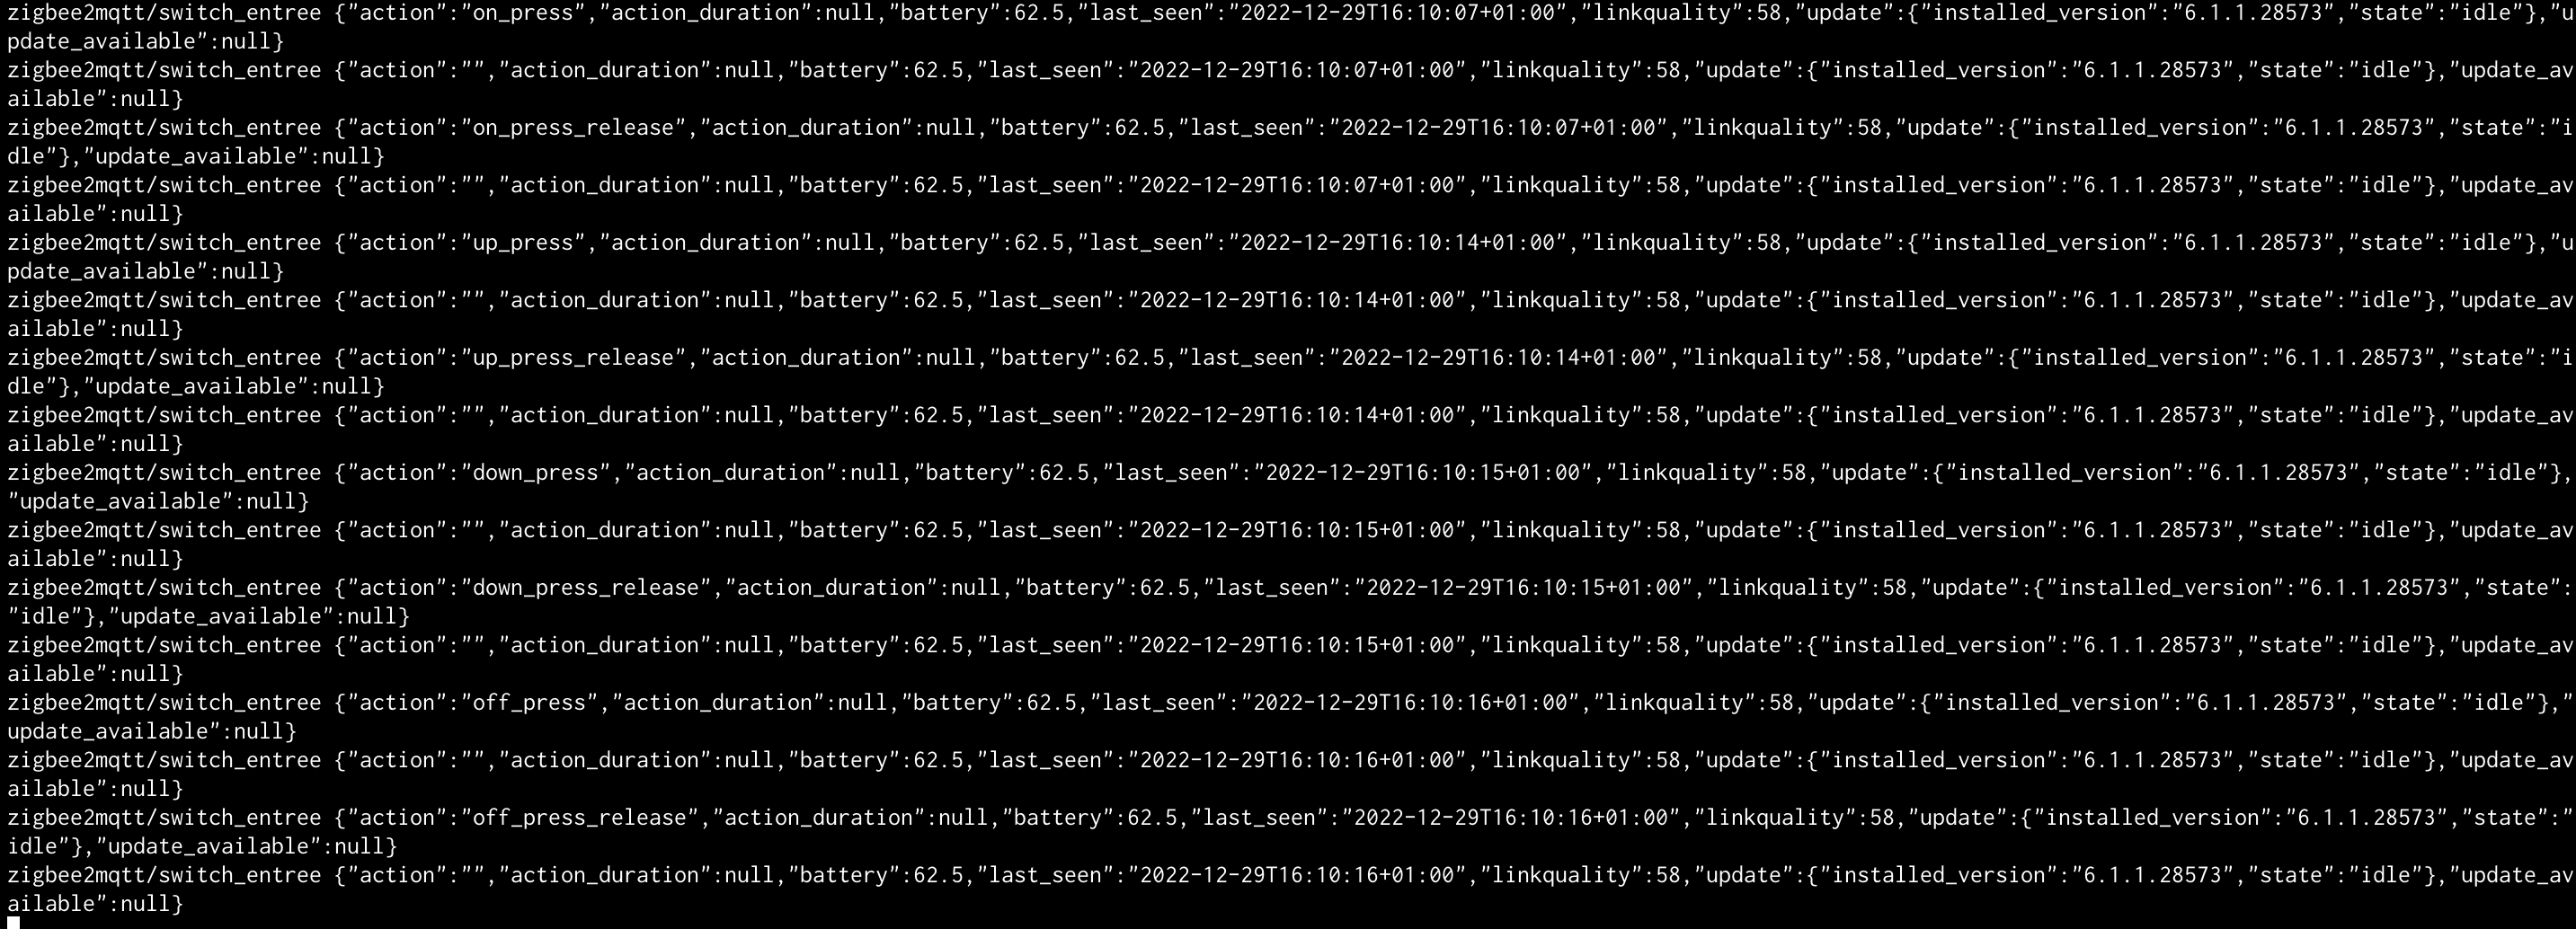
In the screenshot, you have all the action related to the Philips Hue Switch (the first generation): on_press, up_press, up_press_release, ...
You can then use the desired ones within your automation, and even add other parameters coming in each event to trigger your action differently.
If following these steps is not allowing you to see the events, you can change the topic or listen for all the events coming from ZigBee2MQTT. For this just use the wildcard as the topic name: -t "zigbee2mqtt/#"
In this way, you will see a lot of events if you have a big network!

The Automation
Now we have all the information we need, we can set all up in the automation to control what we want.
I provide here an example:
- alias: Switch Toggle Entree
  id: switch_toggle_entree
  trigger:
    platform: mqtt
    topic: "zigbee2mqtt/switch_entree_02"
  condition:
    condition: template
    value_template: '{{ "on_press" == trigger.payload_json.action }}'
  action:
    entity_id: light.entree
    service: light.toggle

- alias: Switch Toggle Escalier
  id: switch_toggle_escalier
  trigger:
    platform: mqtt
    topic: "zigbee2mqtt/switch_entree_02"
  condition:
    condition: template
    value_template: '{{ "off_press" == trigger.payload_json.action }}'
  action:
    entity_id: light.escalier
    service: light.toggle
The switch's upper button toggles a light, and the "off button" another one. The toggle service is just changing the state based on the actual one: if powered on, the light will be switched off; and the opposite.
But, as we are within automation, there is a world opened for us 😎 We can change the light intensity based on the hour of the day: if it is after midnight but before 7 AM the lith is powered on at 30%, 100% all other hours.
Here is where you have to consider if the side effect can have a huge impact compared to what you gain entering the automation scripts.